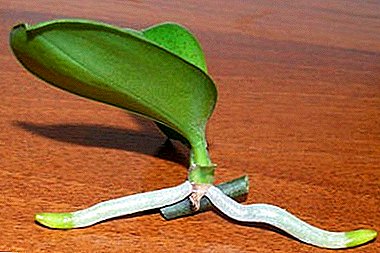
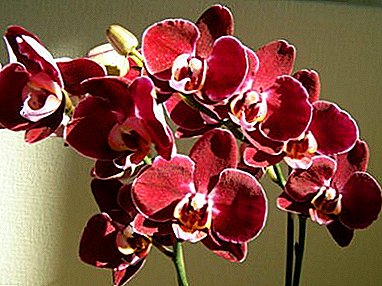
Orchid - indoor flower of amazing beauty, has gained immense popularity with gardeners. In the period of active vegetation on the stems, roots and peduncles babies can appear - small sprouts that have their own root system and miniature leaves.
With a favorable temperature and high humidity, the sleeping kidney wakes up. When, with what and how to separate it and transplant the baby orchid at home, so that it continues to grow?
Propagation by side layers
Orchid babies are young shoots of a plant that periodically appear on the stem and roots, but more often on the peduncle. They have their miniature stalk, buds and leaflets emerging.
Reference! With proper care, babies can appear on their own, but you can wake the sleeping kidney on the peduncle - remove the protective scales and gently process with cytokinin paste.
The role of children in the life of an orchid is difficult to overestimate, since this is their continuation. To propagate a plant with side layers is quite simple - this is the fastest way.
Where do the buds appear?
Children can appear on different parts of the plant:
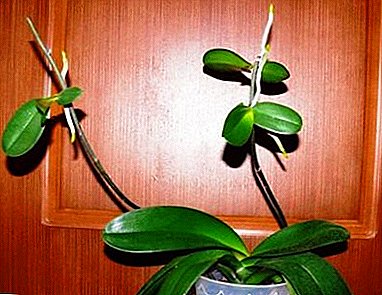
 On the peduncleafter the plant fades, a young sprout appears. It is worth noting that not one baby can appear, but several, and they can be located anywhere in the peduncle, either in the middle or at the very end. But usually only one process appears.
Do not rush to remove the peduncle, create the correct temperature and proper humidity, so that the orchid shoots, which can later be planted. At first, the processes are very small, but over time small compaction will appear from the sides - the roots will begin to form.
- At the roots - Children also appear quite often, in this case, when separating, you need to act with maximum caution, as there is a chance to damage the roots of an adult plant.
- On the trunk - these processes are not recommended to be removed. They do not have their own root system. In addition, the separation can damage the stem of a plant, from which it can simply die.
The baby may appear on the stem if the growing point starts to freeze. After the mother plant dies, the baby will continue to grow.
 On the peduncleafter the plant fades, a young sprout appears. It is worth noting that not one baby can appear, but several, and they can be located anywhere in the peduncle, either in the middle or at the very end. But usually only one process appears.
Consequences for the parent
Some beginner growers do not plant babies from the mother plant, especially if the shoots formed near their roots, mistakenly believing that the plant would be more bushy and beautiful. But this is wrong, since the mother plant spends a lot of energy on the development of the process, and if the baby is not removed in time, it can simply die.
Therefore, there are two main questions:
- When do you need to separate the baby from the plant?
- How to do it right?
When to shoot a bone?
If children have an orchid, then the question arises, when should they be seated? There are several basic signs of readiness:
- Regrown roots.
 While they are not there, the process should not be touched. The roots must be healthy, strong, at least 5 cm long. It is worth remembering that the more roots the baby has, the greater the likelihood that the transplant will be successful and the young plant will survive. It is not necessary to separate the process, if it is less than three roots.
 - The right amount of real leaves.
At least 5 leaves should grow on a young orchid, only this way the chances of survival will be high after separation from the mother plant. Do not forget that good leaves - is the power of the plant from the sunlight and breath.
- Baby spent on the mother plant for at least 8 months, but it is better if exactly one year passes after its appearance.
Do not rush to separate the baby from the mother, let her gain strength for further growth, being on the mother plant. Building up the root system is a tedious and long process. Preparation of objects for transplantation (tools, soil, pot).
 While they are not there, the process should not be touched. The roots must be healthy, strong, at least 5 cm long. It is worth remembering that the more roots the baby has, the greater the likelihood that the transplant will be successful and the young plant will survive. It is not necessary to separate the process, if it is less than three roots.
So, the baby is ready for transplantation, now it's time to prepare everything necessary for this fascinating process:
- special substrate of pieces of bark with a length of 1 cm;
- sphagnum moss;
- a small plastic pot with a diameter of 7 to 10 cm (it should be transparent);
- pruner, scissors or sharp knife;
- activated carbon or cinnamon.
For self-preparation of the soil you need to mix the pine bark of the fines fraction and the sphagnum moss, you can add a little charcoal. Substrate must be well hydrated but not wet..
How to correctly separate the escape?
This can be done in several steps:
- Sterilize the instrument.
- Carefully cut the baby off the mother plant. If it grows on the peduncle, it is worth making oblique cuts on both sides of the process, so that the rest of the peduncle is 1-2 cm. both on the mother plant and on the baby.
- The cut should be treated with cinnamon or crushed activated charcoal. This must be done, otherwise pathogenic bacteria and infections can get into the wounds.
To finally figure out how to separate the orchid escape, watch the video:
Key recommendations
Before you put the baby, slices need to be dried in air for 30 minutes. The pot should be small, you can take a simple plastic cup and make several holes in it, both at the bottom and from the sides.
Detailed step by step instructions and photos
With root system

If the baby is already with roots, then transplanting a small plant will be easy enough.
The action algorithm is as follows.:
- Take a plastic container with holes.
- Lay a drainage layer on the bottom, then a substrate mixed with moss. Moisten the mixture. But before that, it is worth shedding a pink solution of potassium permanganate or calcining it in the oven for decontamination.
- Put the baby in the cup very carefully, so that the point of growth is at the level of the edges.
- Dissipate the substrate, this process should be done with extreme caution, as the roots of the young plant are very delicate.
- The roots should be covered with the mixture completely.
- Watering after transplanting should not be, because in the open wound can get an infection.
- Cover the plant with a transparent plastic bag - it will be a mini greenhouse for better rooting.
Important! The substrate should not be heavily overwetted, as there is a risk of tear rotting. At the same time in the greenhouse it is necessary to ensure the optimum level of humidity for the young plant.
Without roots

There are situations when the baby grows well and develops on the mother plant, it can even bloom, but does not want to give roots. What to do in this case?
We need to act as follows:
- Put a little drainage and moss in a plastic cup with holes.
- In the side of the cup, make two holes opposite each other - for support.
- Set footing.
- Put the outlet on the pedestal - it should not touch the ground.
- Top set a plastic bottle with a cropped bottom.
- In this state, the young orchid will be until the roots appear.
It is worth observing the plant, because ideally transplantation should be carried out only after the roots grow at least 5 cm. It is necessary to be patient, since this process is quite long and can be 4-6 months.
If growing on peduncle

If the orchid has sprung on the peduncle, then the procedure is as follows.:
- Sterile pruners cut the baby off the peduncle.
- At the base of the outlet we find a scale, which should be removed, since it does not allow the roots to develop.
- Now you can begin to grow the roots in the air, as it is impossible to place the plant in the substrate without roots.
- Under the pot equip a plastic cup with holes.
- Lay on the bottom of the drain, put the moss on top.
- Make two holes at the top for the support.
- Place the baby so that it hangs in the air, without touching the moss.
- Cover the structure with a young orchid cut plastic bottle or plastic bag - to create greenhouse conditions. The microclimate in the greenhouse should be close to tropical.
When to produce the first watering?
Under no circumstances should water the seated baby, leave it for 2-3 days. During this time, tighten the wound from the cut. Watering should be as moderate as possible.
Possible difficulties
The following problems may occur during transplantation:
- Infection.
This not only can lead to disease, but also to the death of the plant, so the pruner or knife must be sterile.
- Decay.
Before you put the baby, you need to let it lie on the air for 30 minutes, then process the cuts with ground cinnamon or wood ash.
- If the process is cut too early, it will die.. If there are several babies on an orchid, then it is strictly forbidden to cut everything at once, the mother plant will simply die from the injuries.Attention! Separate at first one child, the second can be deposited as soon as the cut from the first one is fully tightened.
Care for them
It is important to create favorable conditions for the new flower and to know how to care for after a sprout transplant:
- watering is moderate, but once in two days and only with warm water;
- to air plants, raising the bottle several times a day for 20-30 minutes;
- The first feeding is carried out not earlier than 21 days after transplantation.
Conclusion
Transplanting the process of an orchid is not difficult if you follow all the recommendations.. But do not forget that the orchid is a very fastidious plant. And not always transplant gives a positive result. But do not despair.