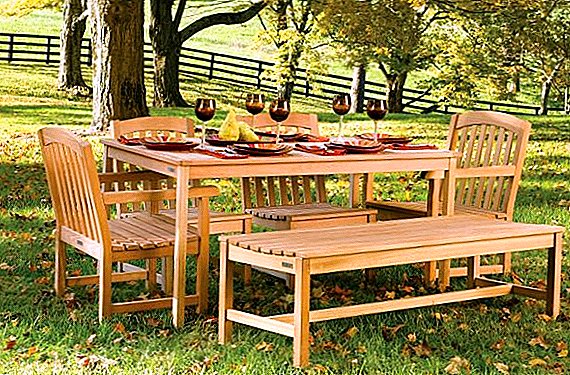
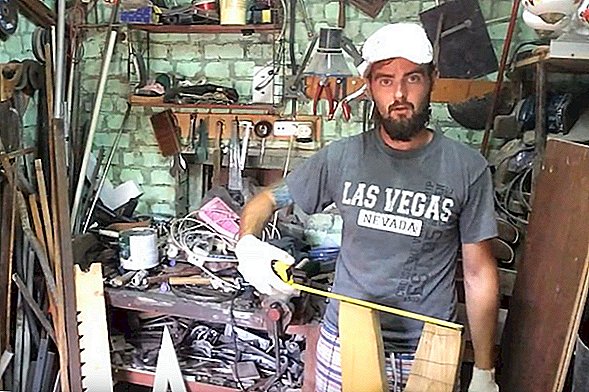
Rest in the country or a plot near the house is strongly associated with gatherings at the table. But many are not satisfied with the design of purchased products, and they take on the design of their own. And often the efforts of home craftsmen turn out real masterpieces. Let's see how to achieve this, with a standard set of tools and materials.
Materials for work
To assemble the table you will need the following materials:
- Board size 300x15x4 cm - 1 pc .;
- 1 long board under the longitudinal jumper (120x20x4 cm);
- boards (600x10x4 cm) - 3 pcs .;
- paint antiseptic for wood;
- coupling bolts;
- screws.

If you have a dacha and you like to create, learn how to make beautiful garden swings, brazier made of stone, swans from tires, build a pool, make sculptures, build and equip a bathhouse, waterfall, fountain, gazebo, gabions and rock arias.
Required Tools
From the tool for work will be required:
- hand saw;
- electric planer;
- a circular saw;
- jigsaw;
- screwdriver (with a bat under the screws and drills);
- rasp and sandpaper;
- chisel.

In principle, you can do with a hand planer and a jigsaw. But they are not particularly convenient - the process becomes more laborious, in addition, the jigsaw allows you to experiment with the shape of the legs and support crossmembers.
Step by step manufacturing process
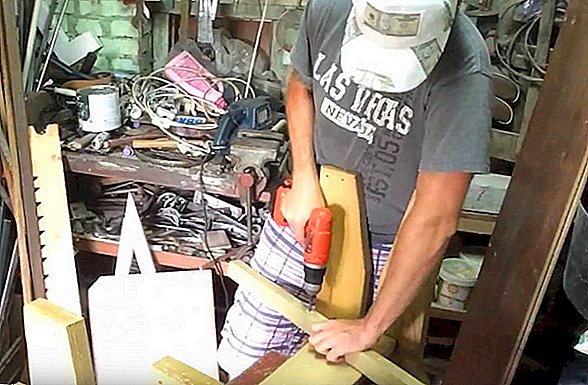
Making sure that all the necessary components are at hand, you can proceed. Work begins with the preparation of boards.
We advise each owner of a private house or suburban area to read how to make a wooden barrel, stepladder of wood with their own hands, build a cellar in the garage, a rocking chair, a tandoor and a Dutch oven.
Cut the boards
First of all, the boards are processed, from which the table top will be assembled.
For table top
It all starts with a tabletop:
- Meter boards (those that "dozens"), mark on segments of 1.5 m.
- Then these fragments are carefully sawn off.
- As a result, there should be 8 blanks with the size of 150x10x4 cm.
 We cut boards for the table top
For legs
Here, too, without too much difficulty:
- The prepared board (15 cm wide) is marked in length with a step of 70 cm.
 We use a template
 - Then four such fragments are cut off, trying to cut the ends equally.
 We use a template
 Cut the boards for the legs
Important! Disassembled pallets can be used for the manufacture of tabletops (but there will be more jumpers in this design, and more time will be spent on polishing).
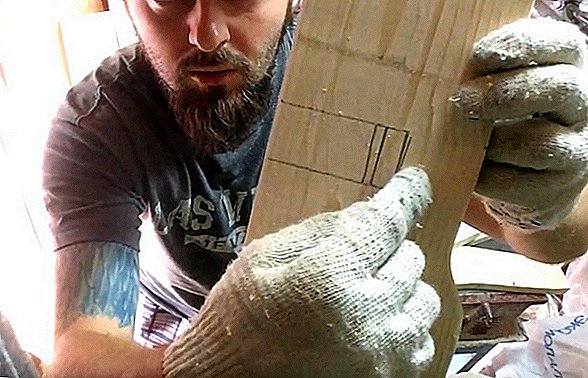
It happens that mistakes happen with dimensions (plus or minus 1-2 cm). So that the blanks are the same, the first one is used as a template - it is applied with one edge to a freshly sawn edge on a large board, and the second edge is marked with the second and subsequent fragments.
Jumper
Cutting under jumper-crossings is done like this:
- Cut 2 boards of 80 cm each (this will be the upper crossbar, so the length should match the width of the table).
- The legs will need a narrow jumper - sawing off 2 fragments of 70 cm each.
- The resulting blanks will need to be dismissed along (into two equal halves), so these boards are marked to a width of 5 cm, and then sawn into a "circular".
- It comes out 8 crossbeams - 4 sizes 80x5x4 cm and the same length of 70 cm (the width will be the same).
 Cut the jumpers
Wood processing
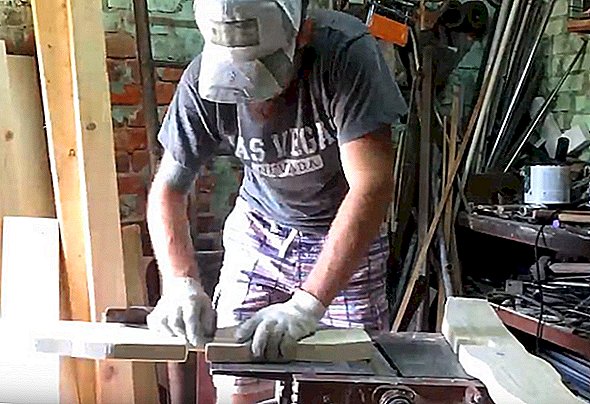
All received after such cutting boards ostriguyut using electroplaning.
Due to the large size of some fragments of the future table, this work is best done on a stationary device.
Did you know? At the beginning of the 20th century, furniture production experienced a technological boom - it went so far that one of the American companies included in its catalog ... a concrete set (although it did not become popular).
If there is none, then a more compact manual version will do as well (but in this case it is necessary to pay special attention to fixing the boards so that they do not move out).
The processing itself looks like this:
- Billets pre-set in their "working position". This is necessary in order to represent exactly how much you have to remove from each board.
- Only then proceed to the run through the plane. Of course, all planes should turn out smooth.


If you want to install a fence for a country house, a plot or a summer house, be sure to read how to choose and install a brick fence, a metal or wooden fence made of a picket fence, a fence from a chain-link grid, a fence from gabions and a fence.
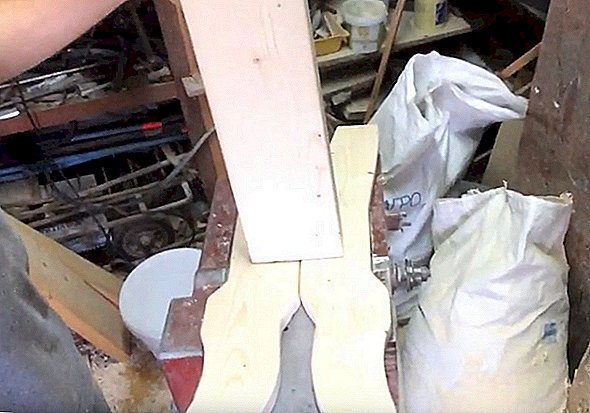
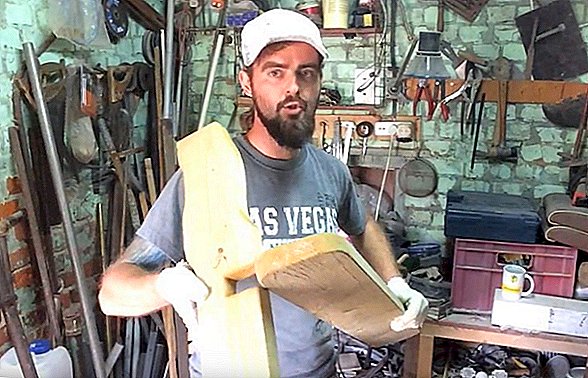
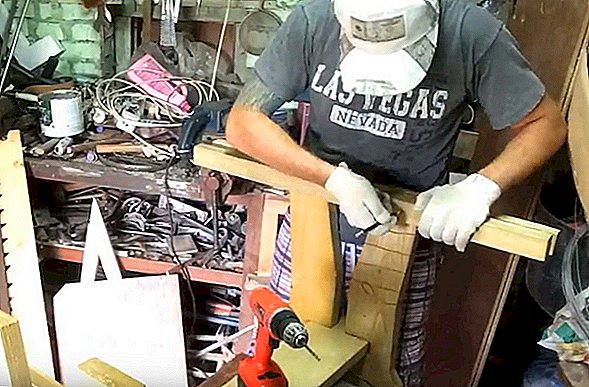
Making legs
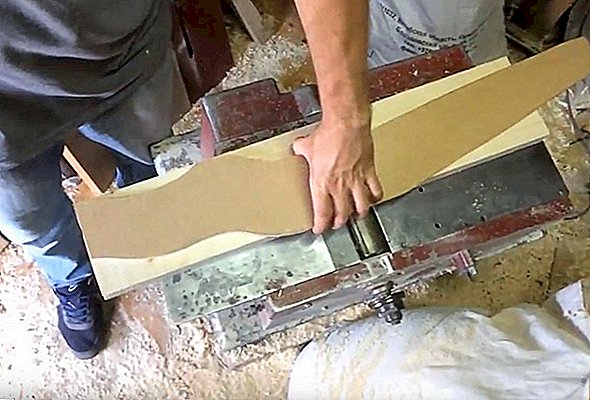
Here you can give free rein to the imagination - specifically in this case, the legs are cut along the pattern. The scheme is quite simple:
- The role of the template performs a piece of plywood, commensurate with blanks under the legs of the table.
- The contours of bends are applied on it with a pencil, along which the veneer will be cut, and later the board.
- After the template is cut and formed, it is applied to the boards and outlines the contours of the same pencil.
- Scheduled lines are jigsaw.
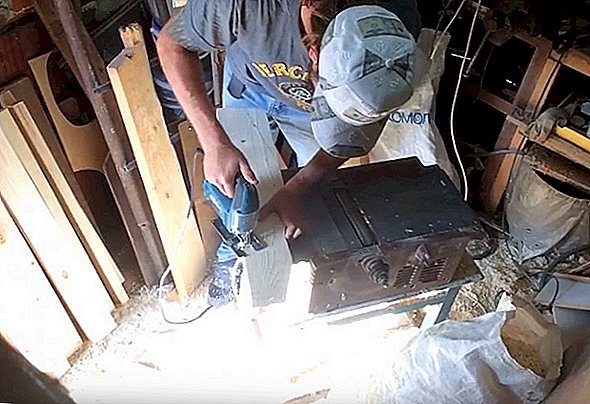
- In the final, the legs are polished, and the most problematic corners are treated with a rasp (and then, again, cleaned with emery paper).


Important! For such grinding it is better to use ordinary sandpaper - the grinders work at high speeds. An accidental mistake in their use can spoil the look of the table - by holding the canvas at one point, you risk burning the wood.
There is one caveat here: the first leg is usually cut out using a plywood pattern. The rest are already adjusted to it. There are reasons for this: having received the finished part in hand, many immediately correct the angles and the bend line. In order not to repeat this work three more times, the first product is applied to the remaining blanks.
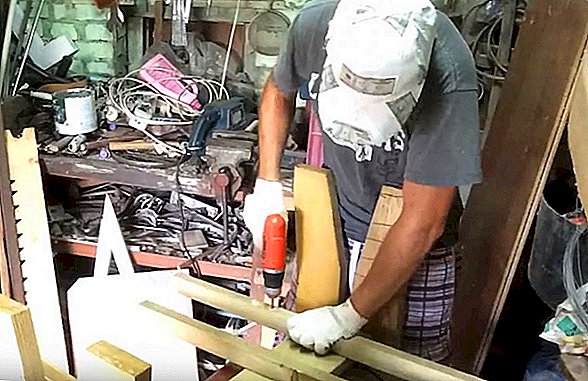
Make jumper
The preparation of cross-bridges repeats the algorithm for working with legs: shaping using a pattern-cutting with a jigsaw-grinding.
Further work with the base (longitudinal) jumper is done in the following order:
- One pair of ready-made and leveled legs lay flat.
- Approximately in the middle, a jumper is placed on it and they lead around its contour with a pencil.
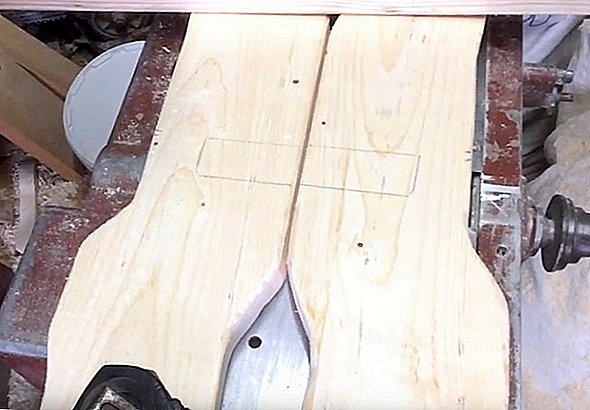
- From the marked strip make indents of 1-2 cm in each direction - so the table will be more stable.
- The contours thus obtained are held with a jigsaw (without leaving the marking line).

- Remaining after two passes with a jigsaw, the jumper between the lines will have to be knocked out with a chisel.
- On the other side of the legs is the same.
- For landing in the nests of the edge of the jumper itself, it will be necessary to process it with a rasp and sandpaper.


Did you know? The first pieces of furniture used by mankind were stone tables and wooden stove benches.
Pay attention - it is desirable to round the protruding corners (jigsaw and grinding to help) - this technique will not allow injuring your feet on the board.
Painting blanks
Before assembly, all the elements of the table need to be painted.
For this purpose, compounds like wood antiseptic "Senezh" are used, which not only give the wood a noble color, but also protect it from weathering and pests.
The procedure is very simple:
- Blanks are laid for painting.
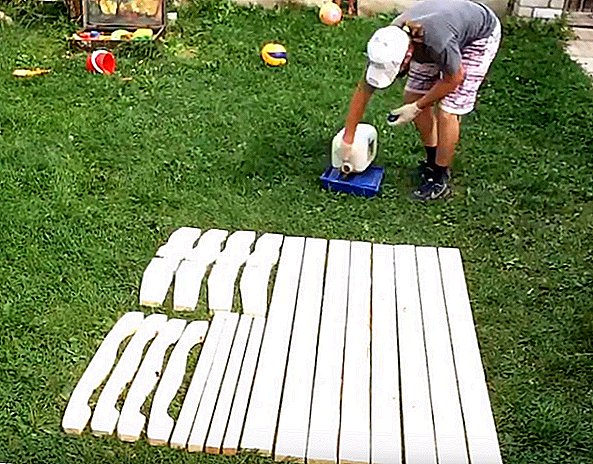
- The composition is poured into a flat container, from where it will be convenient to take a wide brush.
- The liquid is applied to all planes in a uniform layer (try not to allow thickening).
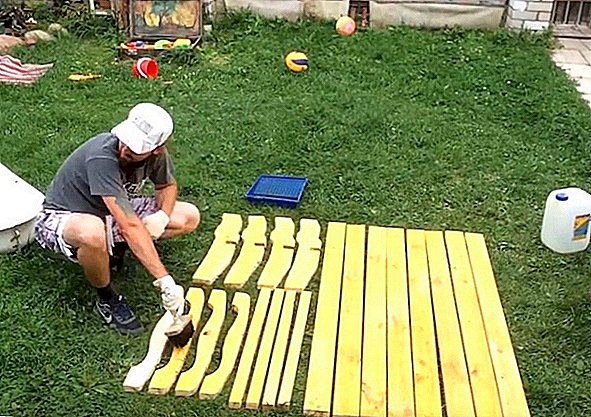


By the way, about drying - with good ventilation, it will take 1-1.5 hours. 
Installing the roof on a new building is an important step that requires proper coordination of actions. Learn how to self-cover the roof with a metal tile, ondulin, to make a mansard and a gable roof.
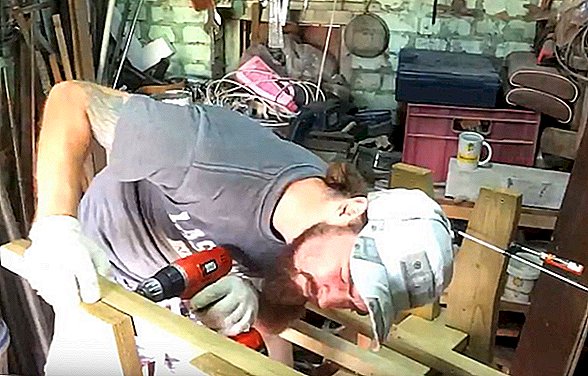
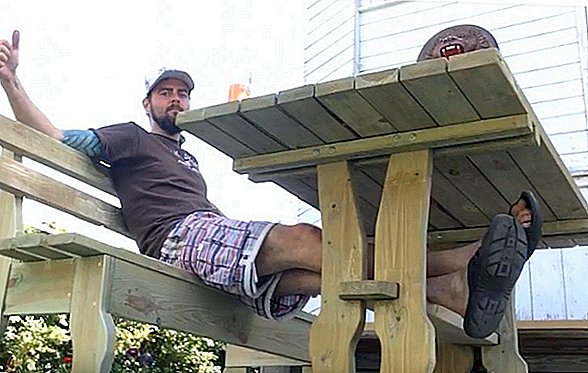
Table assembly
After waiting for everything to dry out, proceed to the final assembly:
- The jumper is put into grooves (at the same time its edges protrude to the outside not more than 5 cm).
- Now you need to measure the distance between the legs (at the top) - if everything is normal, they mark on their sides places for holes for fasteners that will hold the cross member (those that are 80 cm in length).
- Then carefully lay the boards under the tabletop and on the inner side of the transverse planks, stepping back 30 cm from both edges. Do not forget to outline them with a pencil.
- The tabletop is assembled as follows - jumpers are attached to the first board with screws. The remaining 7 boards are exposed with a small gap (for which even plywood is used) - the resulting gap will prevent the wood from bending in the fall and winter, when the material collects moisture.
- Now turn the legs. They are exposed and propped by two more strips of the same size. In the holes already made, wind in and tighten the clamping bolts. The planks themselves are also planted on screws.
- Support strips are attached to the lower part of the legs (70 cm long each). The first pair of outdoor clamps clings to the clamp - it will have to put on the level.
- If there is no misalignment, bolt holes are marked and drilled.
- The same story with the inner pair (these cross-sections are fixed to the clamps exposed above the bolts already inserted - so that the holes coincide).
- At the very end, the fasteners are tightened, once again checking whether there are any distortions. Clamps removed and - the table is ready!


Important! If the holes slightly do not match, they get out of position, drilling one of them (the drill of the same diameter simply moves around the circle, changing the angle of inclination).
Sometimes it happens that the bolts are too long - in such cases they are cut with a hacksaw.
All the above manipulations allow you to assemble a table of size 150x80x70 cm. Of course, these dimensions can be adjusted to your liking - working with boards and the assembly mechanism remain the same.
Video: how to make a garden table with your own hands
If you like to do everything yourself, read how to properly sheathe the door, make a plasterboard partition with a doorway, install blinds on plastic windows and warm the window frames for the winter.
Safety regulations at work
Getting started, you need to remember about your own safety. Here are some simple rules to help avoid injuries:
- It is advisable to cut the boards by wearing gloves - by carelessly clutching the material, you can cut a finger or drive a thorn (which is not always easily removed);
- on the contrary, it is better to work with an electric planer and a circular saw without gloves - often the “pellets” hanging from them can instantly be wound on a rotating plane shaft or teeth of a disk, which is fraught with serious injury, the same goes for long sleeves on shirts;
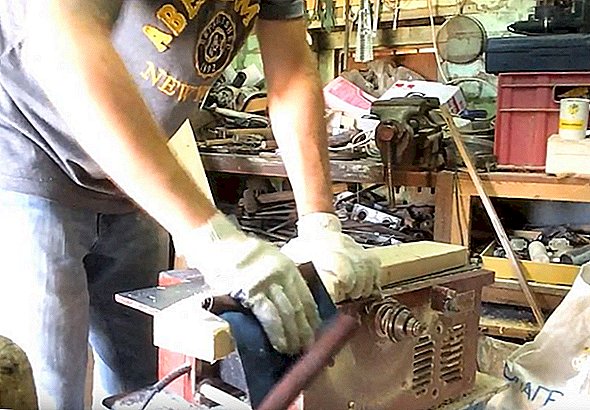
- when dissolving the boards on the circular saw, the untreated part of the workpiece is fed to the disk with the help of a wooden support (in no case with hands);
- it is better to paint in the open air (or at least in a well-ventilated room) - in a warm and unventilated location, its vapors can cause headache or dizziness;
- well, and, of course, use only a serviceable tool (there should be no "walking" handles on chisels or loosely mounted discs on circular saws).

Did you know? One of the trends in the world of furniture are hammock tables (a hammock is fastened under their main plane, in which a pet like a cat can easily fit).
In general, be careful. Yes, and some patience will be useful. On the other hand, the efforts made will be rewarded by the appearance of a beautiful element of summer design.
Now you can imagine how to assemble a table for a gazebo on your own, and what is needed for this. As you can see, with free time and initial skills in working with tools and wood, this is a very real task. Hopefully, the result will meet the expectations, and the table thus assembled will become another favorite location for recreation. Successes in this work!