The incubator is necessary for avid or professional poultry farmers to simplify work on breeding young offspring, as well as to maintain a high level of hatchability of the young.
By resorting to his help, you can be sure that the chickens will be hatching at the appropriate temperature and humidity, which means that the percentage of spitting will be high.
You can purchase a ready-made device, modify the factory incubator to meet your requirements, or you can make it yourself from the beginning to the end. It's easy, as you can see by reading our article.
The advantages of a homemade incubator
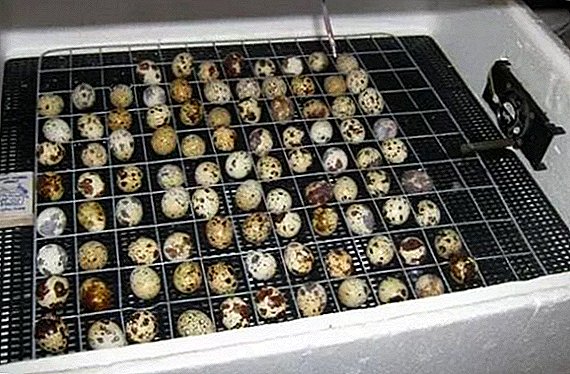
It is known that quails are not good chicks, therefore, in order to bring out as many chickens as possible, it is necessary to resort to the help of an incubator. On sale there are many models that differ in the coup system, functionality, capacity, price. As a rule, high-quality roomy incubators are quite expensive.
Handyman poultry farmers prefer to purchase cheap home appliances, modifying them independently for their goals and preferences. If a person plans to breed a large number of chicks, then it is easier and cheaper for him to make the device with his own hands, using the materials at hand.
We advise you to read about the most important thing in breeding quails at home, about the best breeds of quails, as well as the peculiarities of growing Estonian, Chinese and Manchurian breeds of quails.
So, the main advantages of a homemade incubator model are:
- ease of manufacture;
- cheapness.

Incubator making
We suggest you to consider 4 options for the manufacture of the incubator with your own hands:
- from a wooden box;
- from the old fridge;
- from a foam box;
- from a plastic bucket.
From wooden box
For the manufacture of an incubator, a regular box made of wood will be suitable, which must be warmed up by covering the walls with plywood, foam plastic or a heat insulator.  Inside are installed heating lamps and water tanks that will maintain the required level of humidity.
Necessary materials
You will need:
- wooden case;
- cap;
- 3 wooden logs;
- 2 water tanks;
- metal grid;
- reiki-clamps;
- 2 resistors-heater (PEV-100, 300 Ohm);
- light indicator (suitable from electric iron);
- thermostat;
- 4 brackets (10 mm, 30 x 30);
- 4 bolts M4;
- wire in heat-resistant insulation;
- 4 screws (5x12).

Instruction
- We beat the walls of the box with thick sheets of plywood, foam plastic or heat insulator.
- In the lid we make a window to observe the process of incubation. Cover the window with glass.
- Also in the lid we drill holes through which ventilation will take place. Equip them with movable slats, which, as necessary, will carry out their closing or opening.
- In each corner of the box we install lamps with a power of 40 W with wiring below the cover by 20 cm.
- We make a tray for eggs by stretching a grid or grid on a metal frame.
- The tray is set 10 cm above the floor.
- Inside the box install the fan.
- You should also install instruments for measuring and regulating temperature and measuring humidity — a thermostat, thermometers.
- For a small incubator, you can set the auto-rotate in the form of a movable mesh with a roller. Eggs will gradually move and roll over.
Detailed schemes of the incubator are as follows: 

Important! The incubator should be installed in a room with room temperature, no direct sunlight and drafts, on an elevated surface.
From idle fridge
The case of a failed refrigerator is ideal for the manufacture of an incubator, because it allows you to maintain the desired temperature. Inside it is placed sources of heating and pallets with water to maintain humidity, and also equip it with a thermostat, fan and heat sources. 
Necessary materials
For the arrangement, prepare the following materials:
- 3 trays for eggs with grids;
- fan;
- 6 100 W bulbs;
- thermostat sensor;
- handle turning trays;
- 2 thermometers to measure air temperature and humidity;
- water tray;
- drill;
- Scotch;
- screwdrivers;
- screws;
- 2 metal plates;
- window glass (optional).

Instruction
- Dismantle the freezer.
- We drill in the lid and bottom of the refrigerator with 4 air vents.
- We attach a fan to the upper wall of the refrigerator.
- Install the thermostat on the roof.
- On the side panels above and below we attach the light bulbs - 4 on top, 2 on the bottom, which are connected to the thermostat.
- In the inside we attach the temperature and humidity sensors.
- We fasten metal plates on the side panels.
- We attach trays on the plates with screws - they should be tilted to one side and the other at a 45-degree angle.
- We attach the handle for simultaneous rotation of the trays.
- Install in the bottom of the tray with water.
- If you wish, you can make viewing windows in the door and glaze them. It is also possible to warm the inside of the refrigerator with foam.
From foam box
Homemade foam incubator in appearance is very similar to the factory. The foam keeps the temperature perfectly, so this material is most suitable for the manufacture of an incubation apparatus.
Necessary materials
Prepare:
- ready foam box or 2 foam sheets;
- glass or plastic;
- Scotch;
- glue;
- soldering iron;
- drill;
- 4 25 W bulbs;
- tray for eggs;
- water tray;
- fan;
- thermostat;
- heat insulation foil.

Instruction
- One foam sheet divided into 4 equal parts - the side walls of the incubator.
- Glue the parts in the form of boxes.
- The second sheet is cut into 2 equal parts, and then one of these parts is divided into two with a width of 60 and 40 cm - the lid and the bottom of the incubator.
- In the cover cut a square window.
- Close the window with glass or plastic.
- Stick the bottom to the body.
- Glue stitches with adhesive tape.
- The inner part of the sheathed insulating foil.
- Cut out legs from the remaining foam plastic - bars with a height of 6 cm and a width of 4 cm.
- Stick the legs to the bottom.
- In the side walls at a height of 1 cm from the bottom, drill or burn a soldering iron with 3 air vents with a diameter of 12 mm.
- Attach cartridges for 4 bulbs in the inside.
- Attach the thermostat to the outside of the cover.
- Secure the sensor inside at a height of 1 cm from the tray for eggs.
- Attach an egg tray.
- Install a fan in the cover.
- Put a tray with water on the bottom.
From plastic bucket
This is the simplest version of the home incubator, designed for a small number of eggs. Turning eggs in this design is carried out manually. Water is poured on the bottom of the bucket. Every time you need to pour water, the incubator will need to be disconnected from the power supply.
Did you know? Quails were the first birds born in space. In 1990, the astronauts took on board the spacecraft 60 eggs with embryos, which were placed in an incubator. The hatchability of chicks was 100%.
Necessary materials
You will need:
- 2 plastic buckets with the same volume;
- 60 watt bulb;
- lamp holder;
- digital or analog thermostat;
- a lattice from a box for fruit;
- plywood.
 Bucket Incubator Diagram
Instruction
- On one side and the other side of the bucket, drill 2 air vents of 10 mm each.
- From the other bucket we cut off the bottom about 8 cm high and cut a hole in it, leaving 5 cm edges.
- Insert the second bottom into the bucket.
- We set the grid on it.
- We put a mosquito net on the grid so that the chicks' legs do not fall into the holes.
- Cut out the plywood cover.
- On it we fix a reflector from a tin and a cartridge for a light bulb.
- In the cover we make a hole for the thermostat and 4 air vents.
- Connect the wires from the cartridge. The wires are well insulated.
- Screw light bulb.
- Mount the thermostat to the lid.
- The sensor is installed in the middle of the bucket.
Video: how to make an incubator out of a bucket
Features hatching chicks in the incubator
In order to successfully bring out the young quails, one should select a high-quality incubation material by examining the appearance and x-raying of the ovoscope and prepare the incubator.
Important! Incubator before loading eggs should work at least 24 hours. Only after checking the parameters and their compliance with the norms can the incubation material be loaded.Eggs are suitable for hatching:
- the correct form;
- average size and weight - about 9-11 g;
- not too light and not too dark in color, without significant pigmentation;
- with a pure shell.

When ovoskopirovaniya should reject eggs:
- without air chamber;
- with damage, thickening, thinning of the shell;
- with a few yolks;
- with stains;
- with incorrectly placed yolk.
We advise you to read about how to make a cage, feeder and brooder for quails with your own hands.
The process of quail incubation lasts 17 days. In the first 12 days, the temperature should be at the level of 37.7 degrees, and the humidity in the region of 50-60%. In the remaining period, the temperature is gradually reduced to 37.2 degrees, humidity - by 5-6%. During the hatching, the temperature indices decrease to 37 degrees, and the humidity ones increase by 13-16%.
The eggs are inverted 6 times a day. After the 14th day of incubation, the incubation material is no longer inverted. The incubator is opened 2 times a day for 5 minutes to ventilate and remove carbon dioxide.
Video: Quail Egg Incubation Thus, since quails do not have a well-developed incubation instinct, it is better to hatch their eggs with an incubator.
Read more about when the quail egg production period comes, how many eggs a quail carries per day, as well as how to keep laying quail at home.
It can be purchased - almost every model is designed for the elimination of quail eggs, including, or make your own hands out of improvised means, for example, from a failed refrigerator, a box made of wood, foam plastic or a plastic bucket.  Detailed schemes and detailed step-by-step instructions make it possible to make models of incubation machines for people, even those who do not have special skills.
Did you know? For a long time it was believed that quail eggs for a long period do not disappear even when stored in room conditions, because they contain an amino acid that prevents damage, and also that they do not have a salmonellosis pathogen. However, these are myths - with improper feeding and keeping of birds, they can be sick with this disease and be its carrier. Therefore, like chicken eggs, quail require heat treatment before consumption.