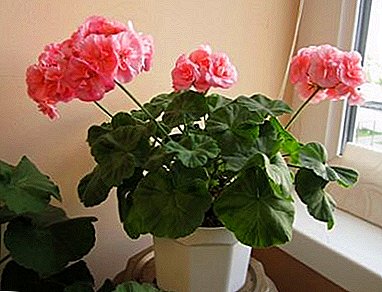
Pelargonium is a delicate flower that looks equally beautiful on a window sill, on a flowerbed or in a garden. Very beautiful and absolutely unpretentious flower, for this reason it is so popular among gardeners. It is possible to propagate this plant in a very simple way using cuttings.
In this article we will tell what is the cutting of pelargonium and how to properly root this plant in a similar way.
How can I multiply a flower at home?
At home, reproduction of pelargonium can be done in two ways:
- Cuttings. This is the most popular method, since cuttings root easily and after about six months they produce flowers.
- Seeds. You need to plant the seeds in late February or early March and grow to an adult flower.
Important! Seeds for growing a hybrid plant must be purchased, since such varieties cannot produce seeds with parental characteristics, and a regular flower with smooth petals will grow from seeds of pelargonium with large fringed flowers.
When and how to chop - general rules
You can practice cutting throughout the year, but it’s still better to do it in springduring the active movement of juices in the plant, which promotes quick and easy rooting.
Cuttings planted in autumn or winter rooted 2 times longer or do not take root at all. In addition, the rooting of shoots in the cold season leads to the fact that without additional lighting they stretch up, lose their compactness and have to be cut in the spring.
Preparation for grafting
 For successful cultivation of pelargonium it is important to choose the right and prepare its shoots for rooting. For breeding need shoots with at least 2 pairs of leaves.
Rooting procedure:
- with a sharp disinfected knife at an angle at a right angle to the stem, carefully cut off a cutting 5 cm long;
- remove all flower branches and buds from him, otherwise he will not have the strength to root;
- leave cuttings in the shade for several hours to dry the cuts;
- treat cut sections with crushed activated carbon, cinnamon powder or "Kornein".
How to get roots in water?
Virtually all varieties of Pelargonium, with the exception of Royal, give roots in water. How to grow them in a similar way? To do this, you simply need to put the cuttings in a container with clean room temperature with water so that it covers a section of 1-2 cm, then wait until the roots appear and transplant them into the soil.
Attention! If there are no roots after a week of the cutting in the water, it is necessary to update the cut and root the flower in the ground.
How to plant?
For a successful planting of pelargonium cuttings, you need to adhere to the following action plan:
- Mixing peat with vermiculite or coarse river sand, prepare a light soil that will pass moisture well (for details on how to choose the soil and pot for planting pelargonium, read here);
- make drainage holes in pre-prepared plastic cups;
- pour the soil into the cups and moisten it well;
- pour boiling water or a solution of potassium permanganate into the soil to destroy microbes and microorganisms in it;
- wait for the ground to cool;
- stick a cutting into the ground 2-3 centimeters deep;
- in the case of yellowing leaves, cover the cutting for several days with a clear glass or glass jar.
The newly planted cuttings do not have a root system yet, so it should not be watered often, otherwise the plant may rot. At the same time, the drying of the soil should not be allowed either, because then the cutting will also dry out. In no case should the cuttings be covered, creating a greenhouse effect - this will lead to rotting or the occurrence of a fungal infection and the plant will die (for more information about diseases and pelargonic pests, see here) Also for planting cuttings, you can use special peat tablets. You need to soak them for 2 minutes in water, then insert the escape into the recess and put everything together in a plastic cup.
Rooting
 Pelargonium cuttings root well at + 20-24 degreesIf temperature indicators are lower, the process of plant rooting and development slows down. It is better to moisten the soil from above, draining excess water from the drain pan through the drainage holes.
During the rooting period it is necessary to exclude top dressing and direct sunlight. Within 2-3 weeks, the cutting will begin to take root, which can be seen through the transparent walls of the plastic cup, as well as from the new, gradually increasing leaves that have appeared on the cutting. In order for the shoot to become a neat bush with beautiful flowering, the young plant should be pinned at the level of the fifth or sixth leaf (we told in this article about how to pinch and trim the pelargonium correctly).
Aftercare at home
After sufficient rooting of the cutting, it is necessary to transplant the plant in a potin which it will continue to grow, for this you need:
- pour drainage (brick chips, pebbles or expanded clay) into the prepared clean pot;
- top to fill the soil layer;
- remove the stalk with a lump of earth and place it in the center of the pot;
- fill the void with earth;
- a little tamp the ground;
- water the plant so that the water does not fall on the base of the stem (how to water, as well as when and how to fertilize pelargonium, you can find here);
- remove the flower in the shade for a few days.
We told about the features of planting, transplantation and rooting of pelargonium here.
In the future, care for the plant is carried out as usual. You can use a ready mix for pelargoniums or begonias, or you can cook it yourself by mixing 1 part of fine river sand, 2 parts of leaf humus and 1 part of turf ground.
What if something went wrong?
The probability that the cuttings will not take root and not take root, exists, so it is better to prepare more cuttings. If the cuttings have stood in the water for a week and do not take root, you need to make another cut above the first one, dry it, sprinkle it with coal and plant it in the soil.
It is important to monitor the temperature of the soil in the flowerpot on the windowsill - it is often lower than the air temperature and because of this the root system does not develop, but rots. With the help of grafting, you can simply and quickly reproduce pelargoniumwhile maintaining all varietal characteristics of the plant.
In this process, there is nothing difficult and, if you follow the instructions, you can get a lot of beautiful flowers that will delight those around you with their flowering.


